Mastering the Art of Street Pole Boulevard Banners: A Saffa’s Guide to Eye-Catching Design

Mastering the Art of Street Pole Boulevard Banners: A Saffa’s Guide to Eye-Catching Design
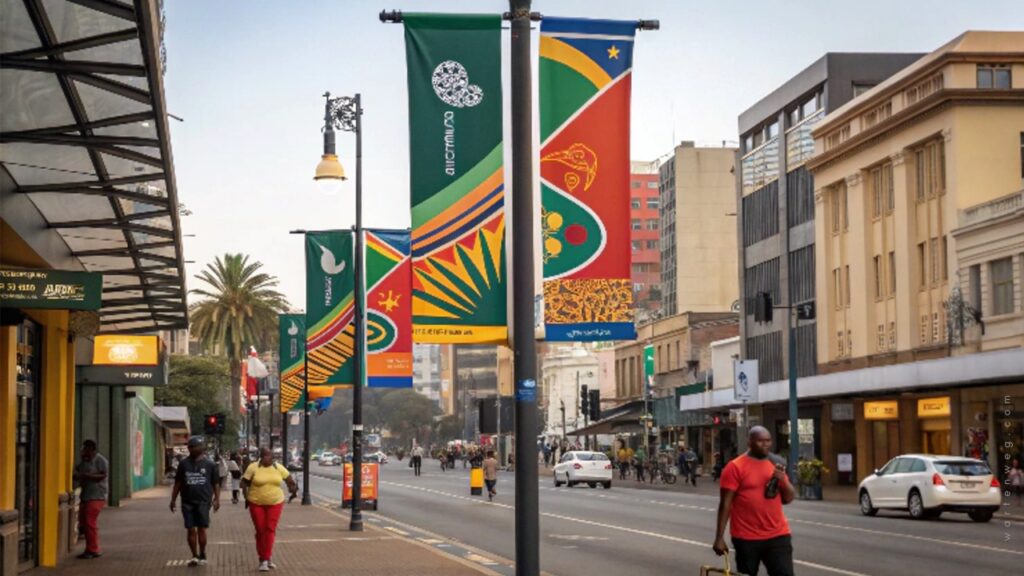
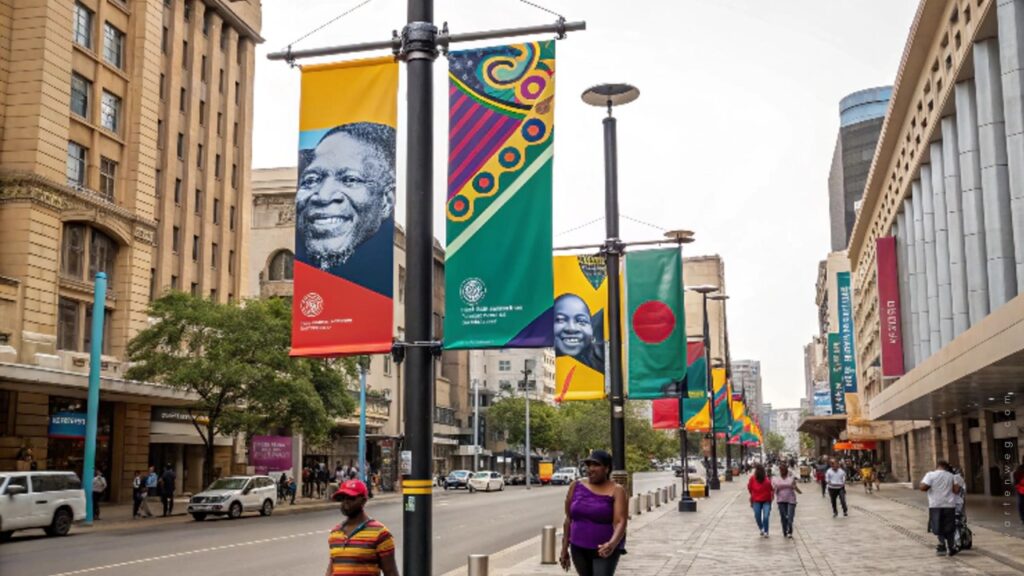
Howzit, design fam! It’s Lindani from Warten Weg. Today we’re diving deep into street pole boulevard banners. They’ve become as common in our cities as braais on the weekend. Ja, you know those striking banners you see while cruising down Cape Town’s streets? You also spot them while checking out the scene in Joburg. Let’s get lekker and chat about how to make them pop!
Table of Contents
The 411 on Street Pole Boulevard Banners (Or As My Gogo Would Say, “Those Tall Pretty Things”)
Street pole advertising requires more than just slapping some graphics on a piece of vinyl. It’s not just about calling it a day. Ag, I’ve seen too many attempts that look like they were designed during load shedding! Whether you’re in Cape Town hustling with street pole advertising frames, you need to master the art. Or, if you’re in Pretoria working on street pole adverts, this skill is essential. You need to learn this craft well.
Why Street Pole Boulevard Banners, Though?
Eish, let me tell you something straight: in South Africa, we’ve got a unique way of doing things. Street pole advertising South Africa-style isn’t just about visibility; it’s about creating something that makes people say, “Sharp, sharp!” when they see it. From Camps Bay to Sandton, these banners are becoming more popular than a Nando’s hot sauce!
The Technical Stuff (Don’t Fall Asleep, It’s Important!)
Before we get to the creative jazz, let’s talk specs. A proper street pole boulevard banner needs to be set up right in Photoshop. Here’s what you need to know:
- Canvas size: Usually 30 inches x 80 inches (Bigger than your aunty’s Sunday lunch spread!)
- Resolution: 300 DPI least (as sharp as a peri-peri chicken)
- Colour mode: CMYK (Because RGB is like wearing sandals with socks—just wrong for print.)
The Design Process—Making It Lekker
Right, now for the fun part! Here’s how we make these street pole boulevard banner designs pop:
Background Game Strong
- Start with solid colours that grab attention faster than a taxi in the fast lane.
- Use gradients that flow smoother than a Castle Lite.
- Keep patterns simple—we’re not trying to create a shweshwe fabric here!
Typography That Talks
- Choose fonts that can be read from further than a spaza shop sign.
- Make sure your hierarchy is clearer than directions to Table Mountain.
- Don’t get too fancy—this isn’t a wedding invitation, boet!
Images and Graphics
- High resolution is non-negotiable (like wearing sunscreen at the beach).
- Use vector graphics where possible (scalable like our electricity prices!).
- Keep it clean and professional (unlike my first car).
Street Pole Boulevard Banner Templates – Your New Best Friend
Ja nee, templates can be your secret weapon. Just like having a good recipe for malva pudding, a solid street pole boulevard banner template can be invaluable. It will save your bacon when deadlines are tighter than payday week. But remember:
- Customise them properly (Don’t be that person who just changes the text).
- Adapt them for local vibes (What works in Durban does not work in Bloemfontein).
- Keep the essential elements (like keeping the gravy for your pap).
Pricing and Production Tips (Because Money Talks, Boet)
Let’s talk about street pole boulevard banner price considerations:
- Material matters (like choosing between beef or chicken for the braai)
- Print quality can’t be skimped on (like trying to save money on car insurance—it always bites back).
- Installation costs (Those pole banner mounts aren’t going to hang themselves!)
Pro Tips from a Saffa Designer
After years of creating street pole advertising Cape Town style, here’s what I’ve learnt:
Weatherproof Your Design
- Our African sun is no joke.
- Consider wind resistance (It gets windier than a politician’s promises).
- Plan for durability (Like a Nokia 3310, remember those?)
Location Matters
- Street pole sign holders need to be strategically placed.
- Consider viewing angles (like picking the perfect spot at a braai).
- Think about traffic flow (both vehicle and foot traffic, not just your cousin’s TikTok views).
Keep It Simple
- Your message should be clearer than a summer’s day in the Karoo.
- Use contrasting colours (but don’t make it look like a rainbow nation explosion).
- Remember: Less is more (like salt on biltong).
Common Mistakes to Avoid (Learn from My Fails, Fam)
We’ve all been there—making mistakes that make us want to hide behind our laptops. Here are some street pole boulevard banner ideas of what NOT to do:
Overcrowding
- Don’t try to fit your whole company profile on one banner.
- Leave breathing room (like when your mother-in-law visits)
- Keep text minimal (unlike a WhatsApp group during load shedding).
Poor Colour Choices
- Avoid colours that fade faster than summer holiday plans.
- Remember contrast is key.
- Test your colours in different lights (like checking your outfit before leaving the house).
The Future of Street Pole Advertising
The game is changing, my friends. Street pole boulevard banners for sale are evolving with new materials, better printing tech, and smarter designs. We’re seeing:
- More sustainable materials
- Better mounting systems
- Interactive elements (But let’s not get too fancy—this isn’t the Metaverse!)
Wrapping It Up (Like a Perfectly Rolled Gatsby)
Making the perfect Street Pole Boulevard Banner is like creating a great potjie. It requires time, pays attention to detail, and love. Whether you’re working on street pole advertising frames in Joburg or designing street pole mockups in Cape Town, remember to keep it:
- Professional but with personality
- Bold but not overwhelming
- South African but globally appealing
Final Thoughts (Before We Hit the Braai)
Remember, my friends, in the world of street pole boulevard banner design, standing out is crucial. It is as important as having a good wifi connection during load shedding. Keep it simple, make it bold, and always, ALWAYS test your designs before sending them to print.
Want to see more of my work or chat about your next project? Find me at Warten Weg, where we turn ordinary street pole adverts into extraordinary attention-grabbers. Until next time, stay creative. Remember to check those banner measurements twice. It’s just like your mom checking if you’re wearing a jacket in winter!
Sala kahle, design warriors!
About the Author: Lindani L. Thango is the creative mastermind behind Warten Weg, specialising in street pole advertising and digital design. When he’s not creating eye-catching banners, you can find him braaiing with clients. He also teaches his cat to appreciate good typography.
Frequently Asked Questions About Street Pole Boulevard Banners
What are the standard dimensions for street pole boulevard banners in South Africa?
The standard dimensions for street pole boulevard banners in South Africa are typically 30 inches (76.2 cm) wide by 80 inches (203.2 cm) high. These dimensions guarantee optimal visibility while maintaining structural integrity when mounted on street poles.
How long do street pole banners typically last in South African weather conditions?
Street pole banners typically last between 6-12 months. Proper installation is crucial. They must be made with high-quality materials. These materials can withstand South African sun and wind conditions. You can extend their lifespan by using UV-resistant inks. Weather-resistant vinyl materials also help. Coastal areas may need more frequent replacement because of salt air exposure.
What’s the best material for street pole banners in high-wind areas like Cape Town?
In high-wind areas, heavy-duty vinyl mesh material is recommended. It should be at least 400 gsm. This material allows wind to pass through and maintains image clarity. The mesh construction reduces wind load on the banner. This significantly decreases the risk of damage or detachment during strong gusts.
How much does it cost to run a street pole advertising campaign in major South African cities?
A typical street pole advertising campaign in major South African cities ranges from R15,000 to R50,000 per month. The cost depends on the location and number of poles. The cost includes design, printing, installation, and monthly rental fees for the pole space. Main street locations in business districts command premium rates.
What permissions are needed to install street pole banners in South African cities?
You need municipal approval. You also need a street pole advertising license from the city’s outdoor advertising department before installing any street pole banners. The application process usually takes between 2 and 4 weeks. You must send your design, proposed locations, and proof of public liability insurance.